Step 1: Create the App on Microsoft Azure
-
Go to the Azure Portal
Navigate to the Azure Portal. -
Search for App Registrations
Use the search bar at the top of the page to find and select App Registrations. -
Create a New App Registration
- Click on New Registration.
- Provide a name for the app.
Example: SharePoint Integration App. - Copy the app tenand_id and client_id from the App homepage
-
Generate a Client Secret
- In the left-hand menu under Manage, go to Certificates & Secrets.
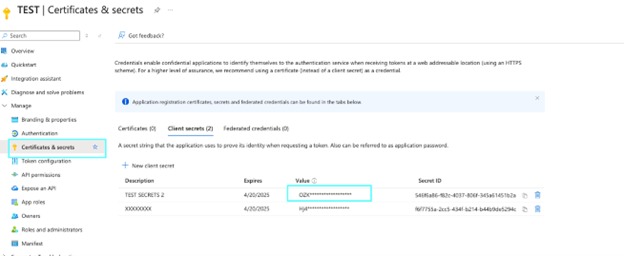
- Click on New client secret.
- Add a description (e.g., “SharePoint App Secret”).
-
Set the expiration date and click Add.
Note: Make sure to copy and save the client secret, as it will not be displayed again.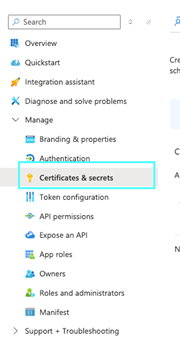
-
Configure API Permissions
- Under Manage, go to API Permissions.
- Click on Add a permission and select Microsoft Graph.
- Choose Application permissions.
- Search for and select the following permissions:
Files.Read.AllSites.Read.All
- Click Add permissions.

-
Grant Admin Consent
Ensure the user performing these steps has admin privileges. Grant admin consent for the app by clicking on Grant admin consent for the necessary permissions.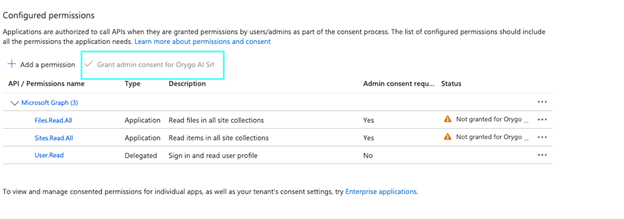
Step 2: Set Up SharePoint Integration on OrygoAI
-
Access the OrygoAI Control Panel
- Navigate to the OrygoAI Control Panel.
- Go to the Integration section.
- Select SharePoint Integration.
-
Connect OrygoAI to Your SharePoint Site
To connect OrygoAI to your SharePoint site, enter the APP credentials (client_id, tenant_id and client_secret) as well as the site name and site hostname for the SharePoint you want to connect: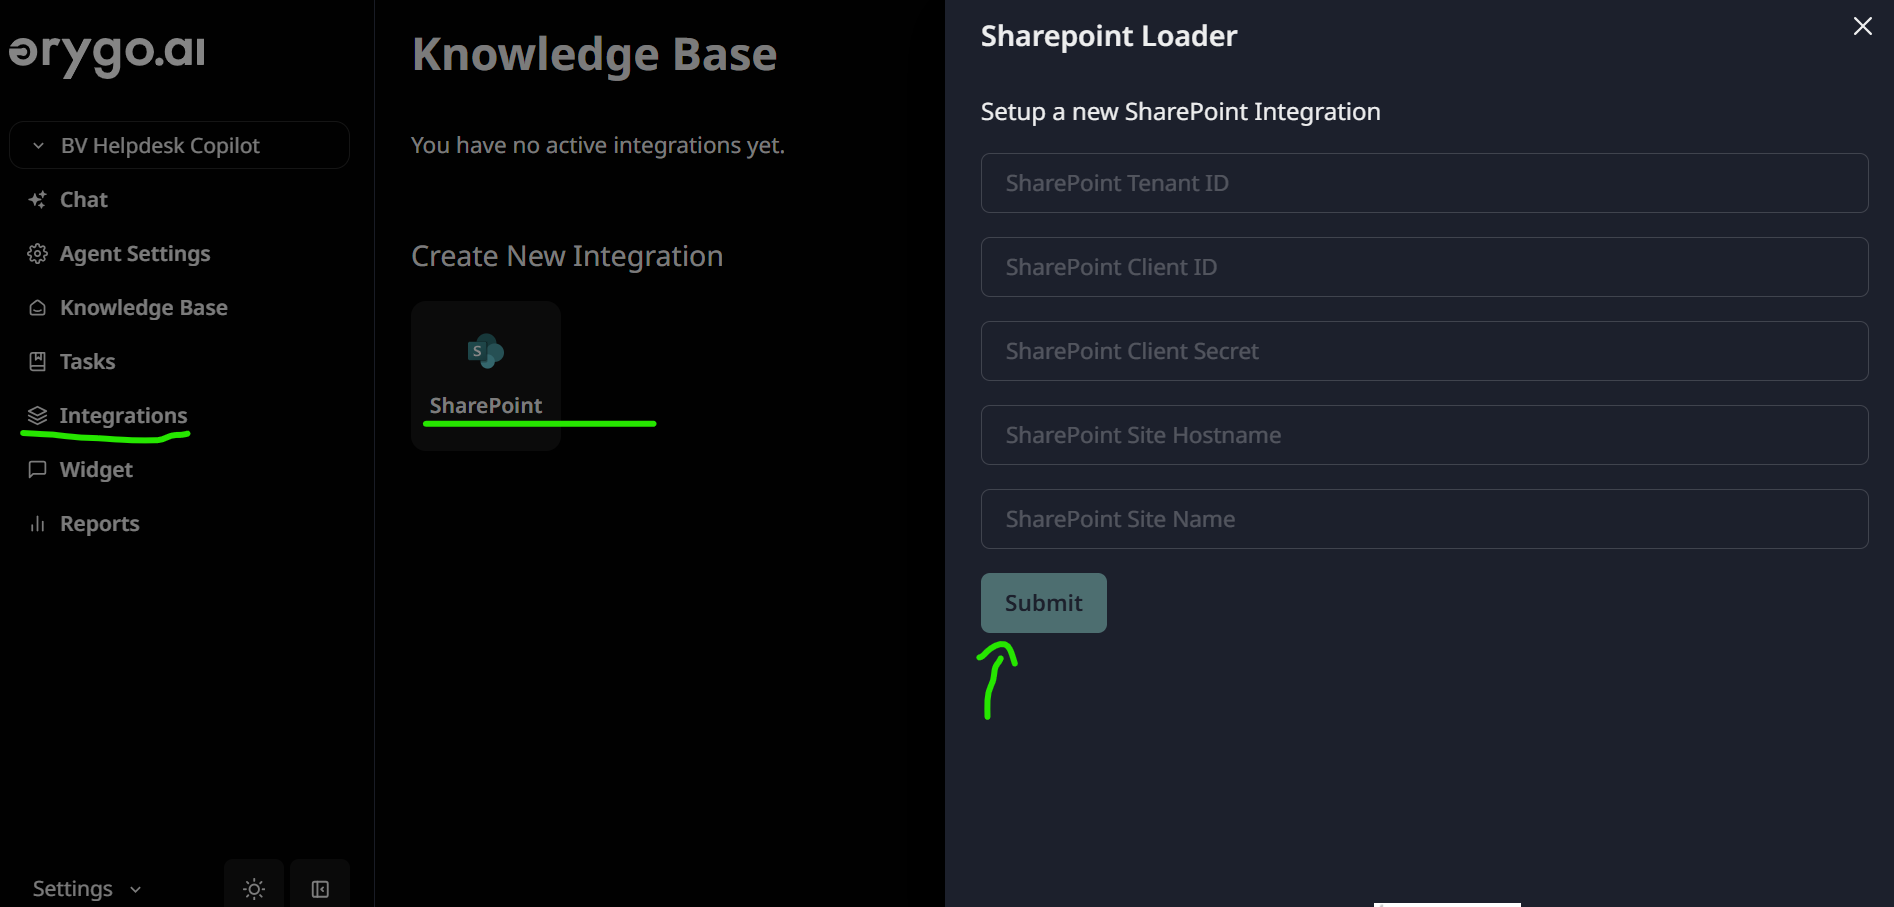
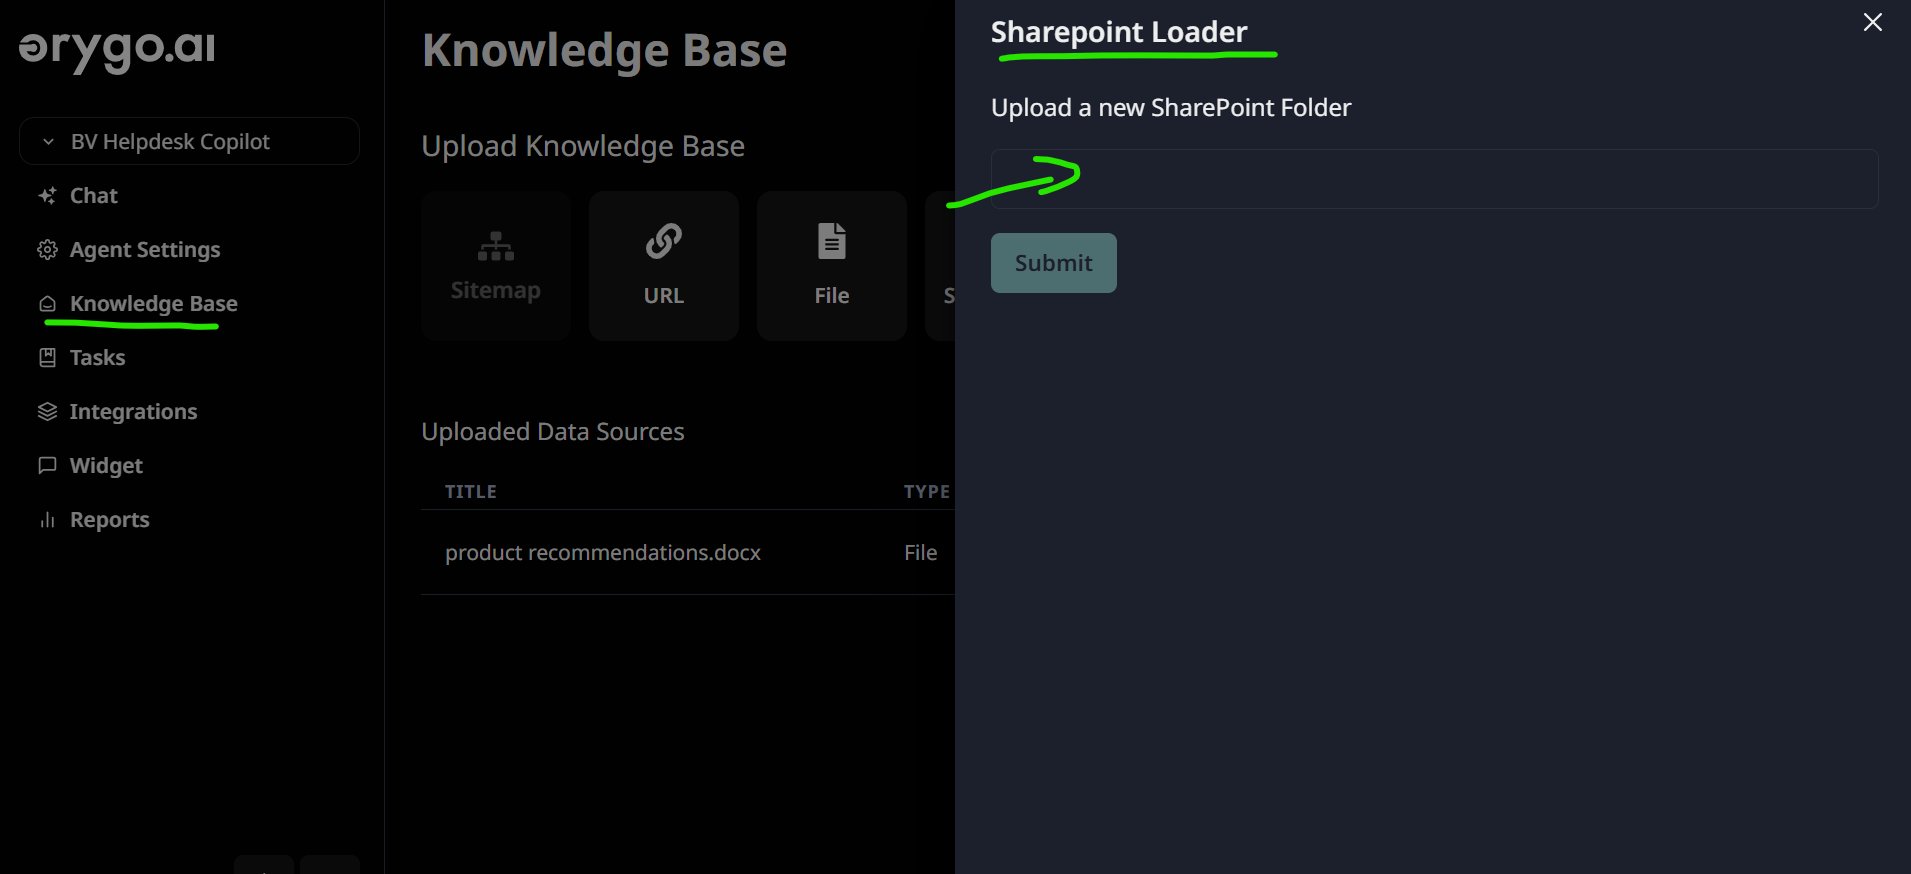
Step 3: Upload SharePoint Folders to Your AI Agent’s Knowledge Base
Once the SharePoint integration is active, follow these steps to upload SharePoint folders into your AI Agents’ knowledge base:- Go to the Knowledge Base section of the OrygoAI Control Panel.
- Select SharePoint as the source.
- Add the URL(s) of your SharePoint folders into the uploader to import them into your AI Agent’s knowledge base.