Step 1: Create a Shopify App to Generate API Credentials
-
Create a New App in Shopify
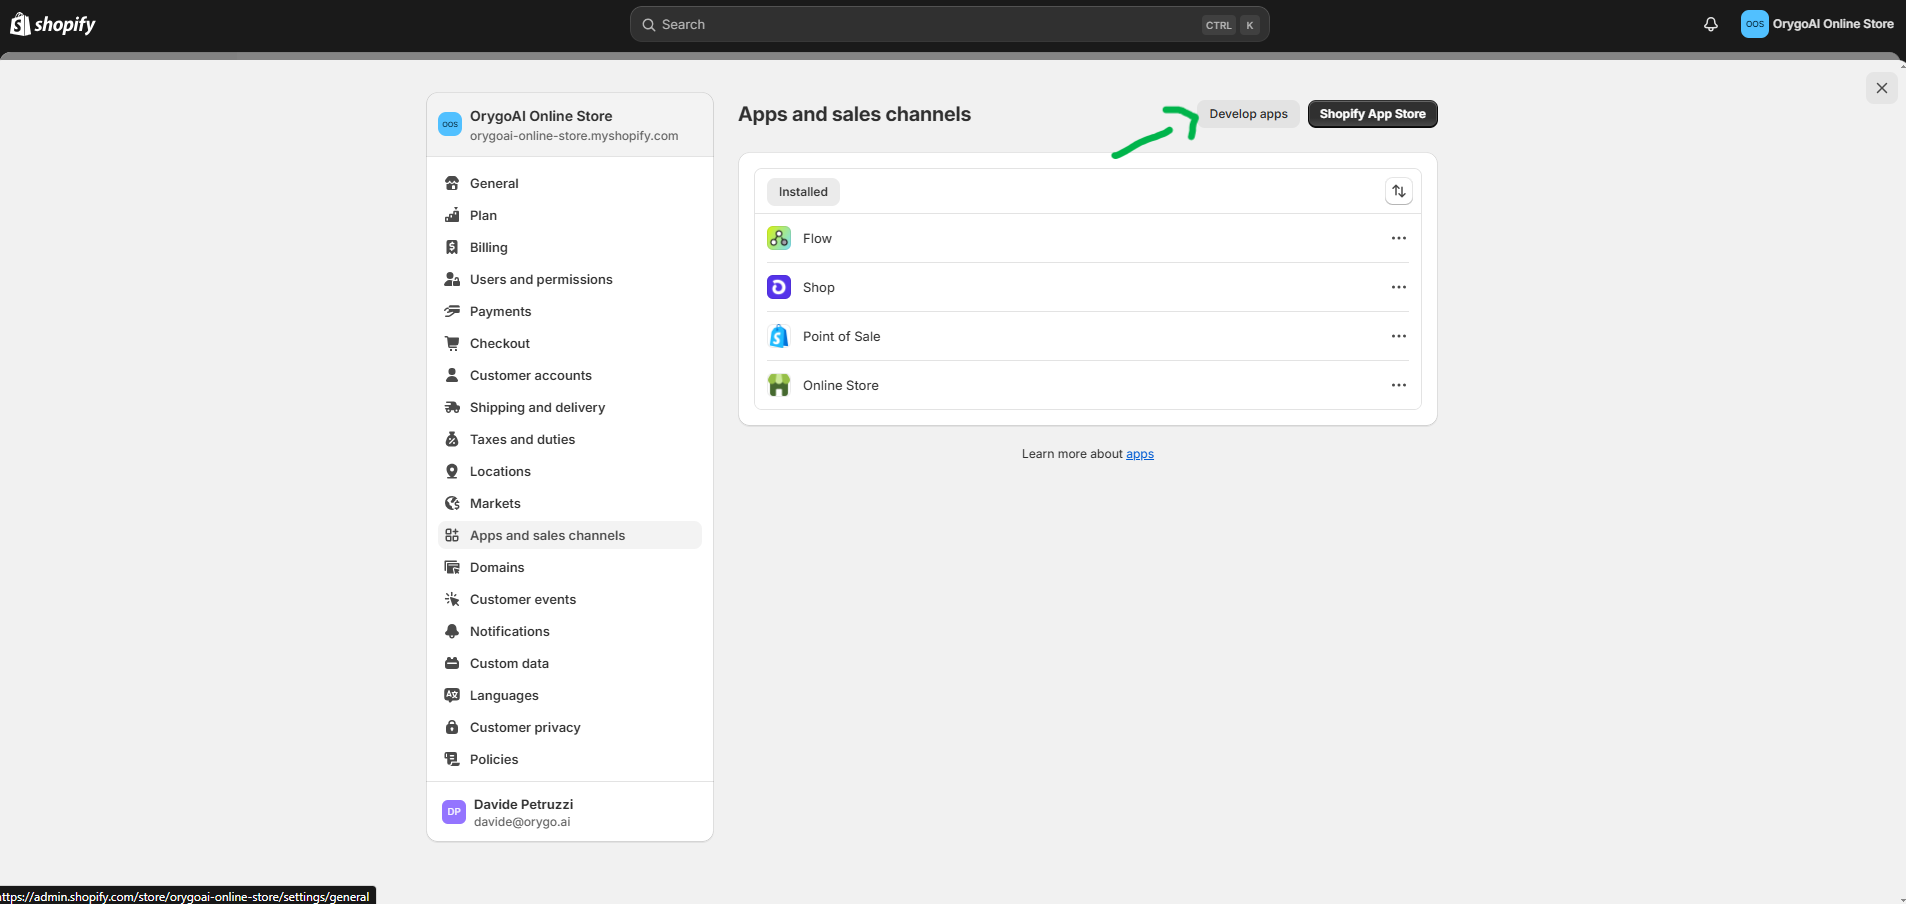
- Go to your Shopify Admin, navigate to Settings > Apps and Sales Channels, then select Develop Apps.
- Click on Allow custom app development.
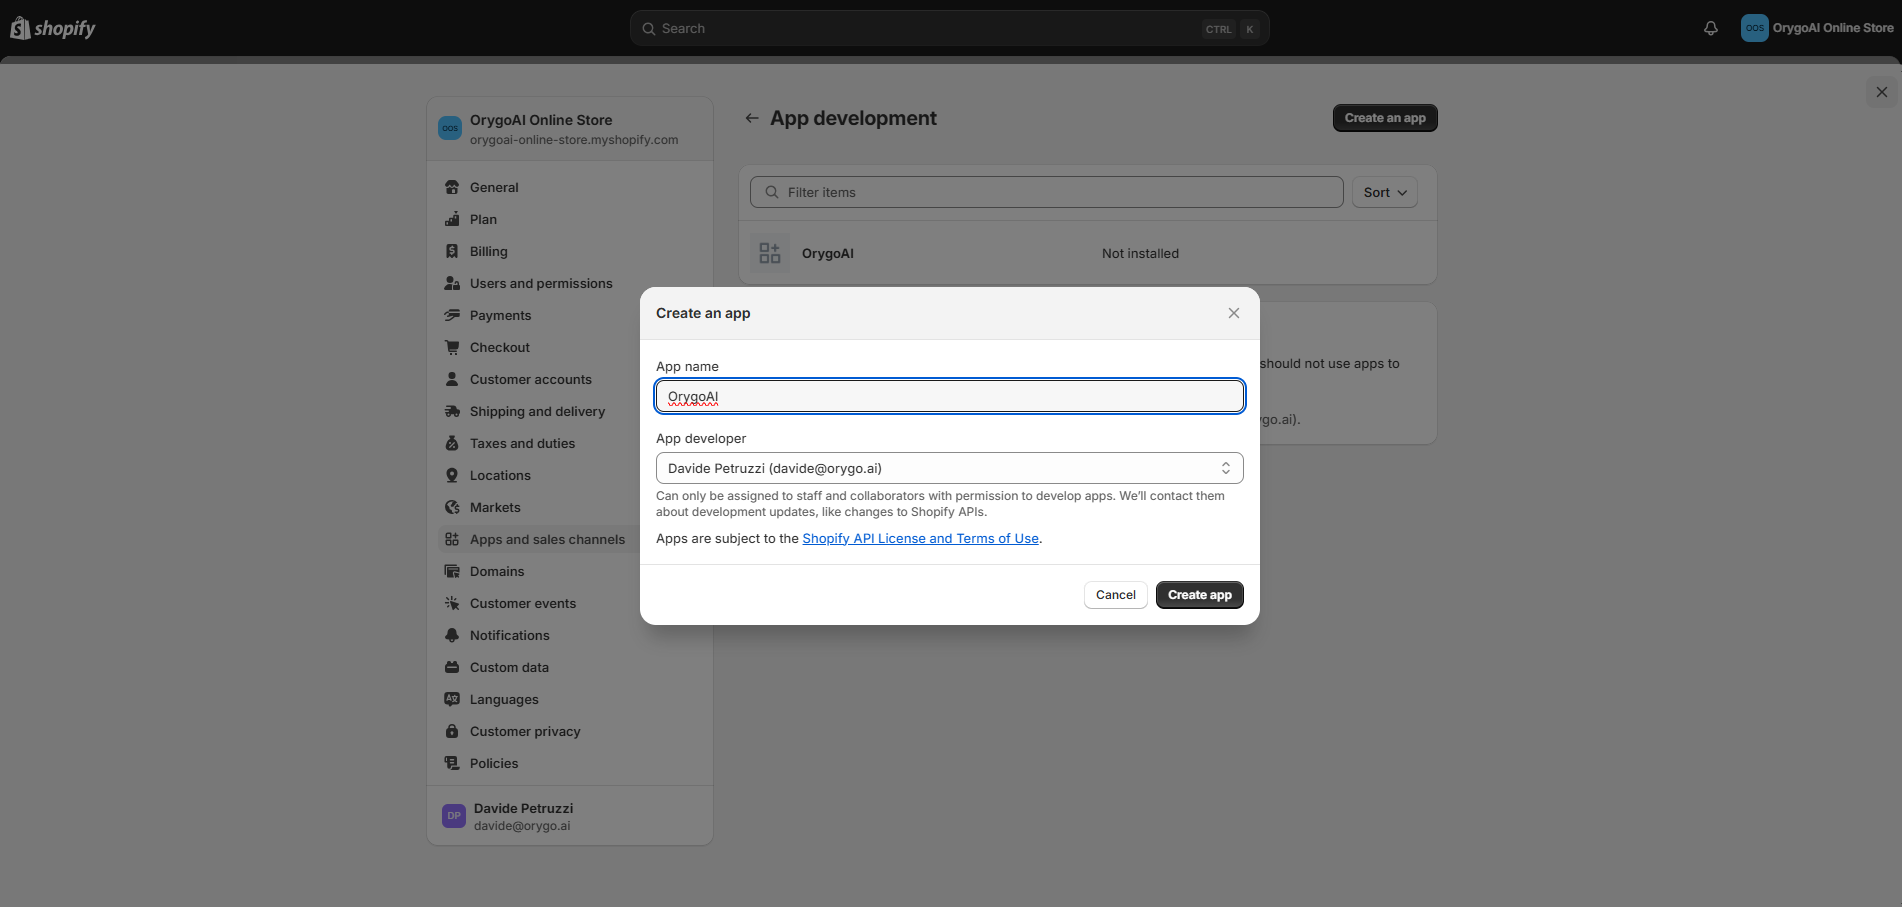
- Click on Create App and name it OrygoAI for easy identification.
-
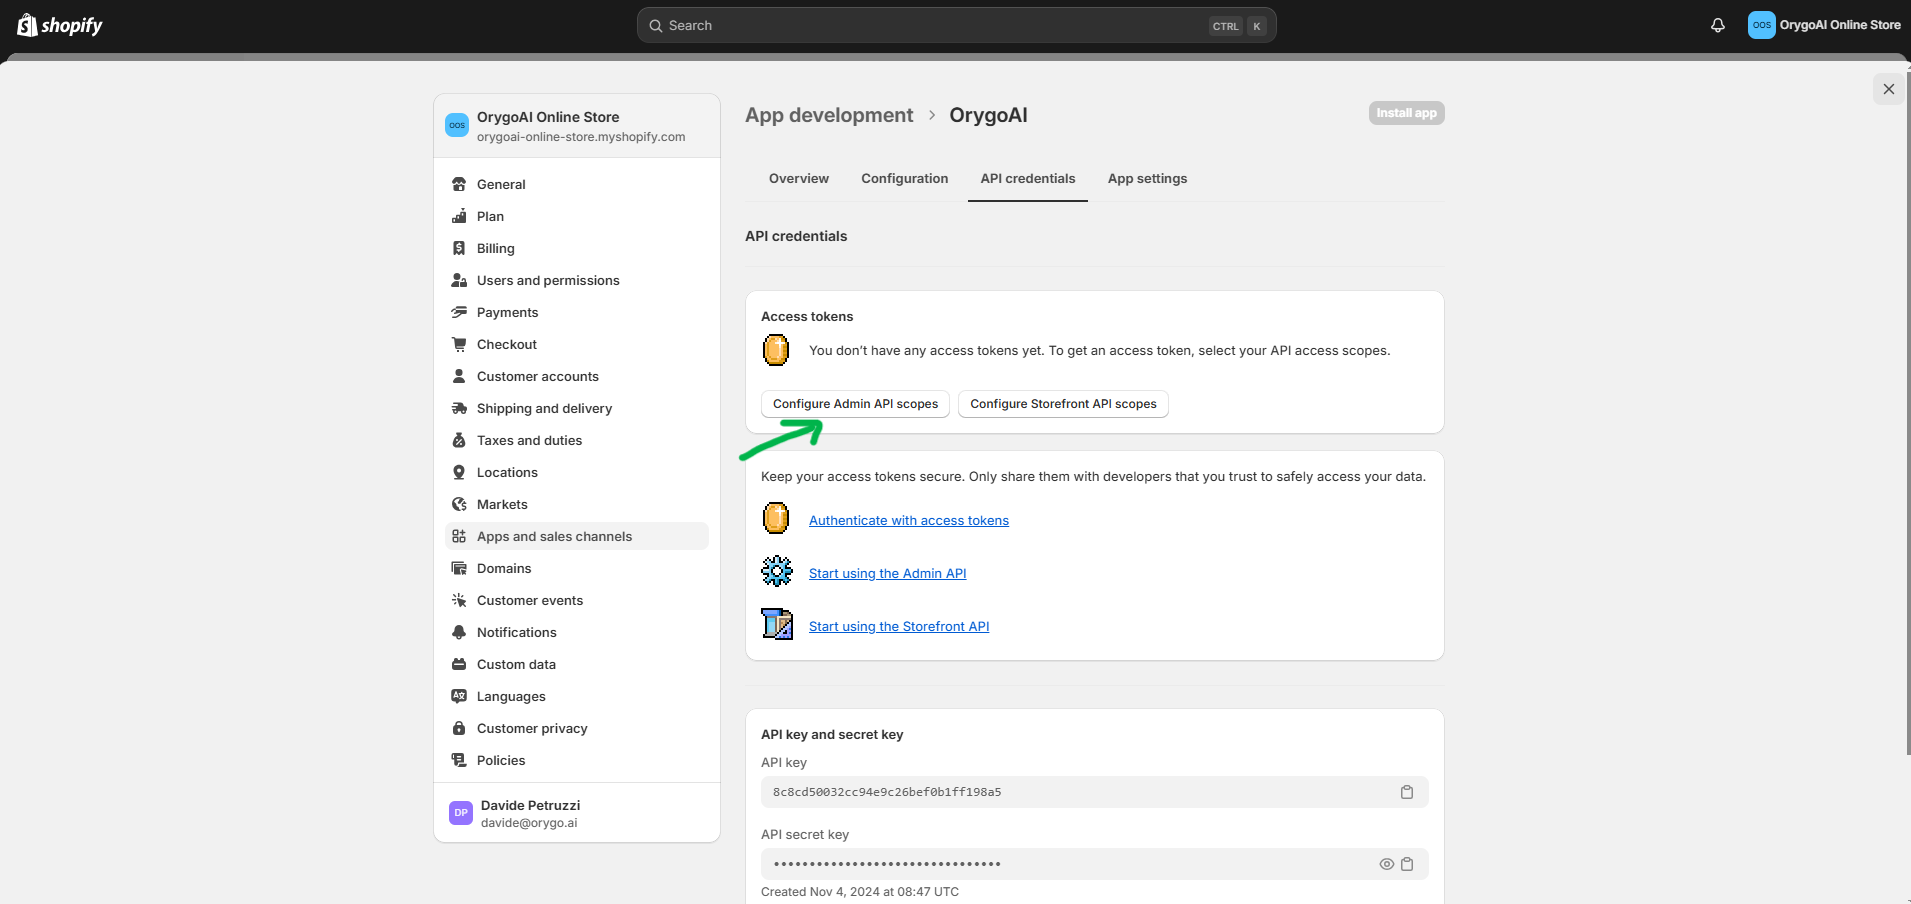
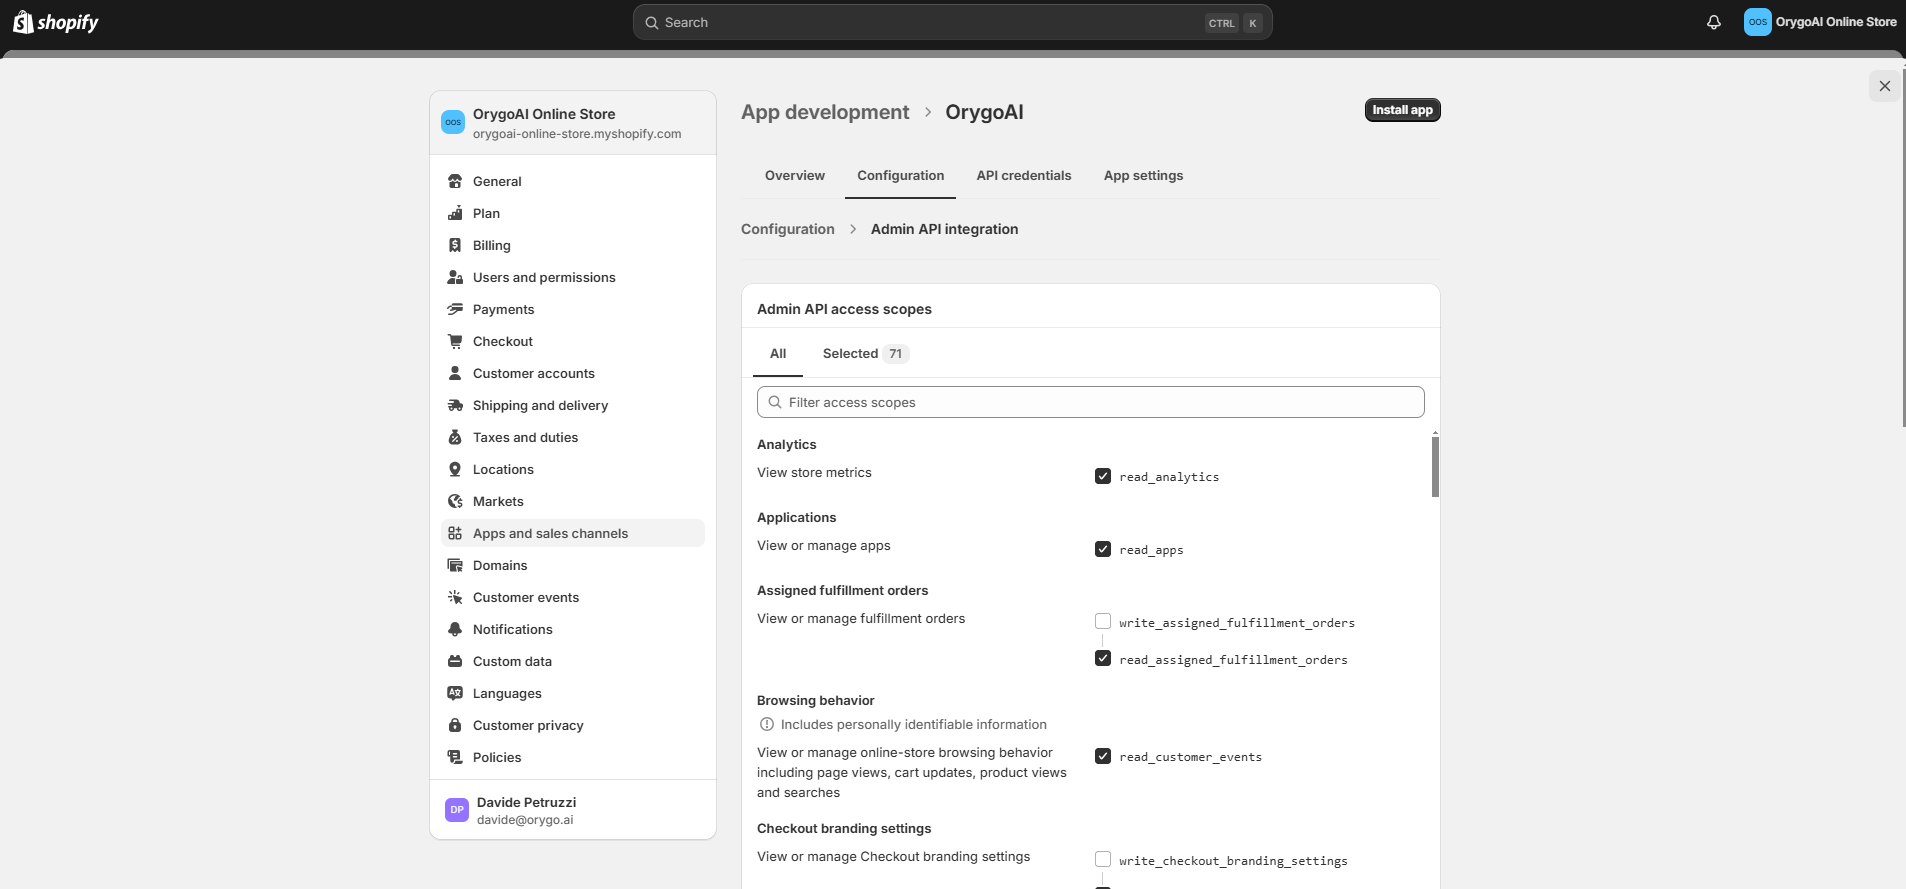
Configure API Access Scopes
- Go to API credentials and select Configure Admin API scopes.
- Choose the permissions you want your AI agent to have. For example, select read_orders if you want your AI Agent to access order details.
- For general setup, selecting all “read” options provides comprehensive access to store information.
- If unsure about the necessary permissions, reach out to us at engineers@orygo.ai.
- Click Save once you’ve configured the scopes.
-
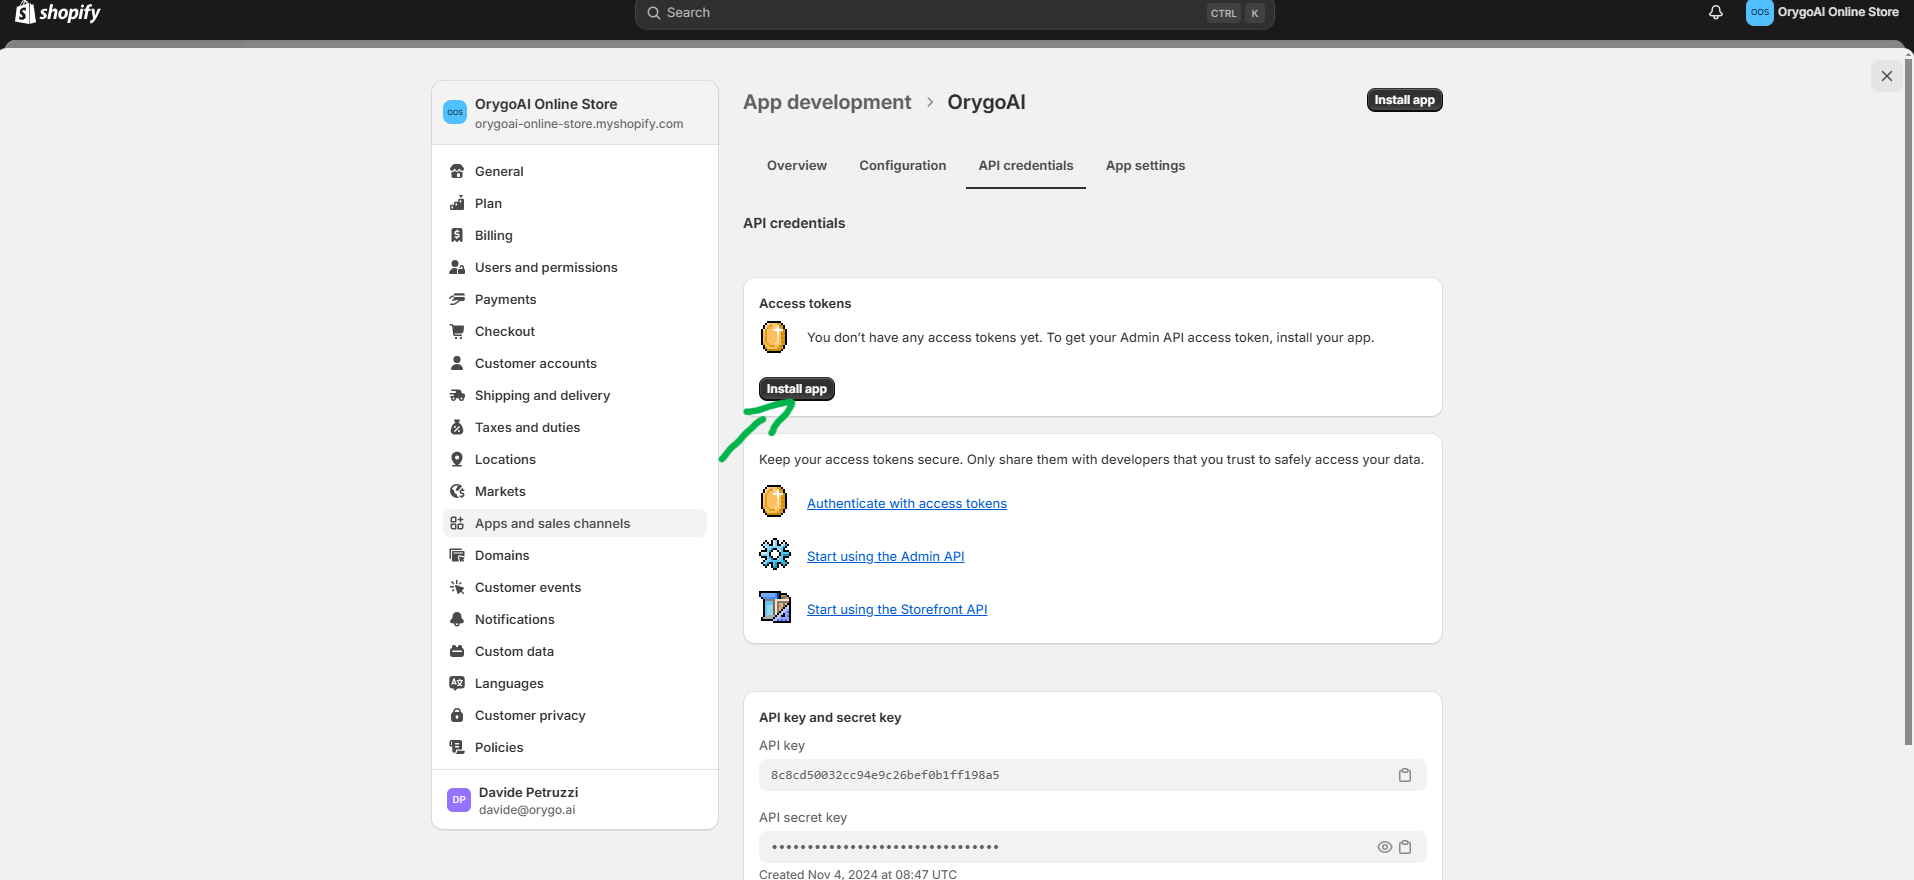
Install the App and Obtain API Credentials
- Go back to API credentials and click on Install App.
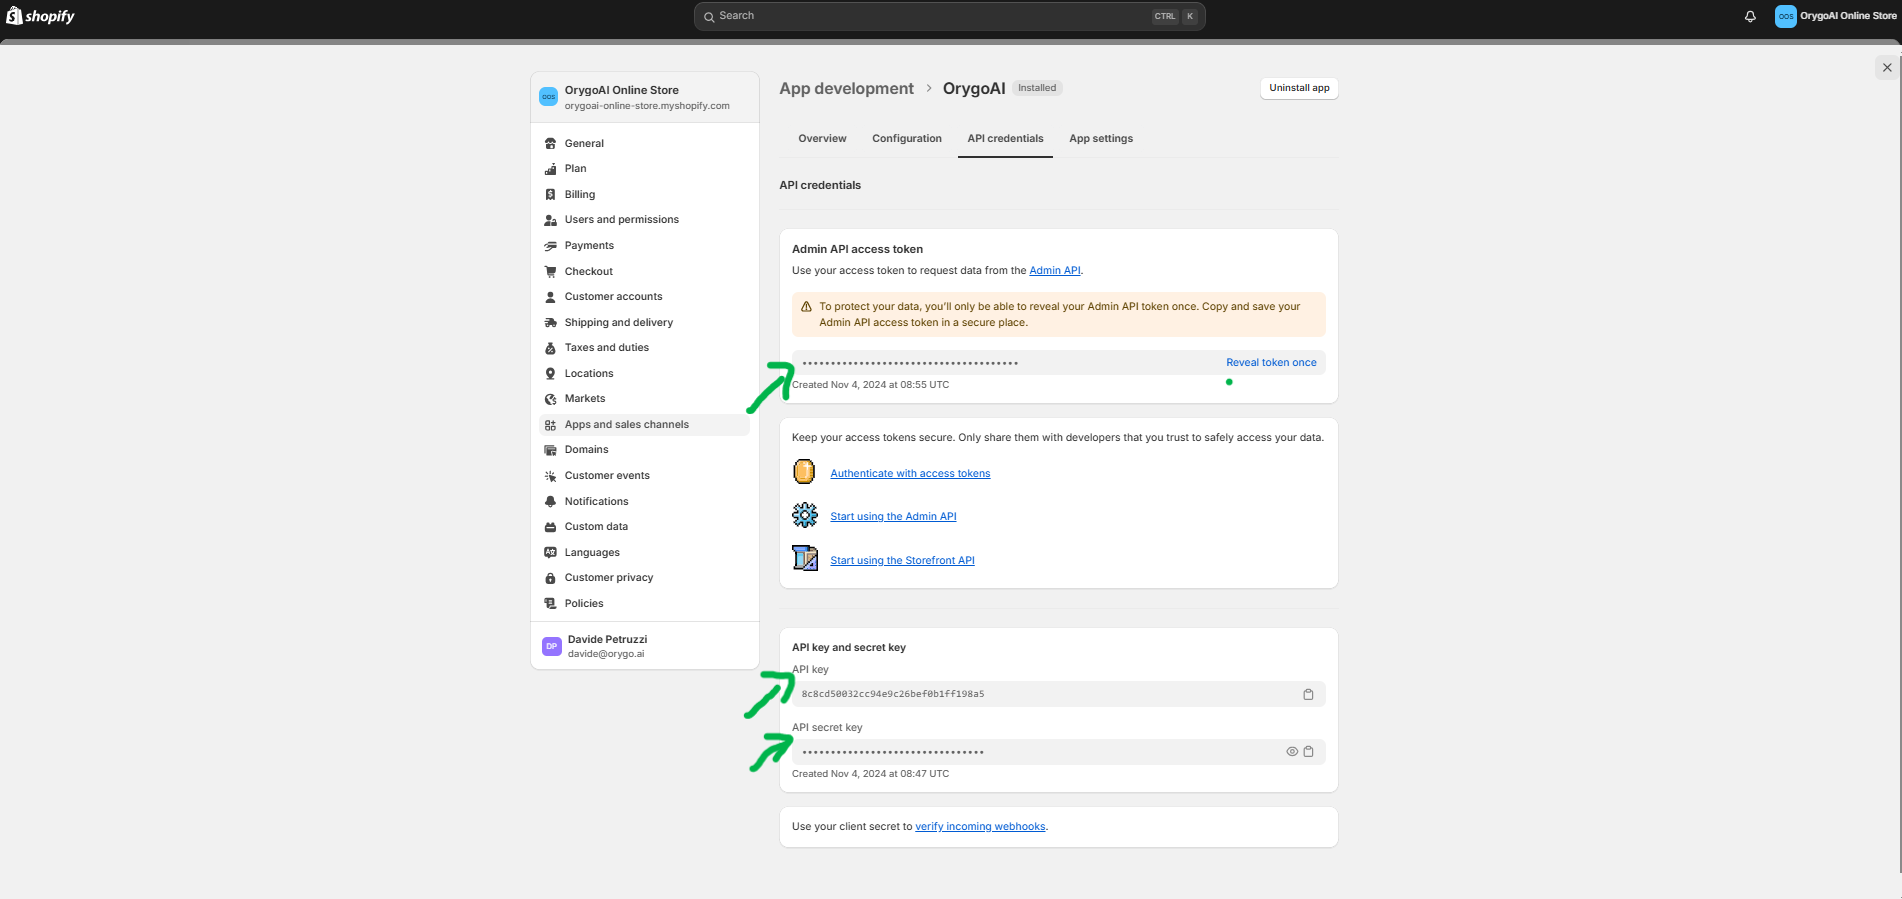
- After installation, you will find the necessary credentials:
- API Key
- API Secret Key
- API Access Token
Step 2: Set Up Shopify Integration on OrygoAI
-
Access the OrygoAI Control Panel
- Navigate to the OrygoAI Control Panel.
- Go to the Integration section.
- Select Shopify Integration.
-
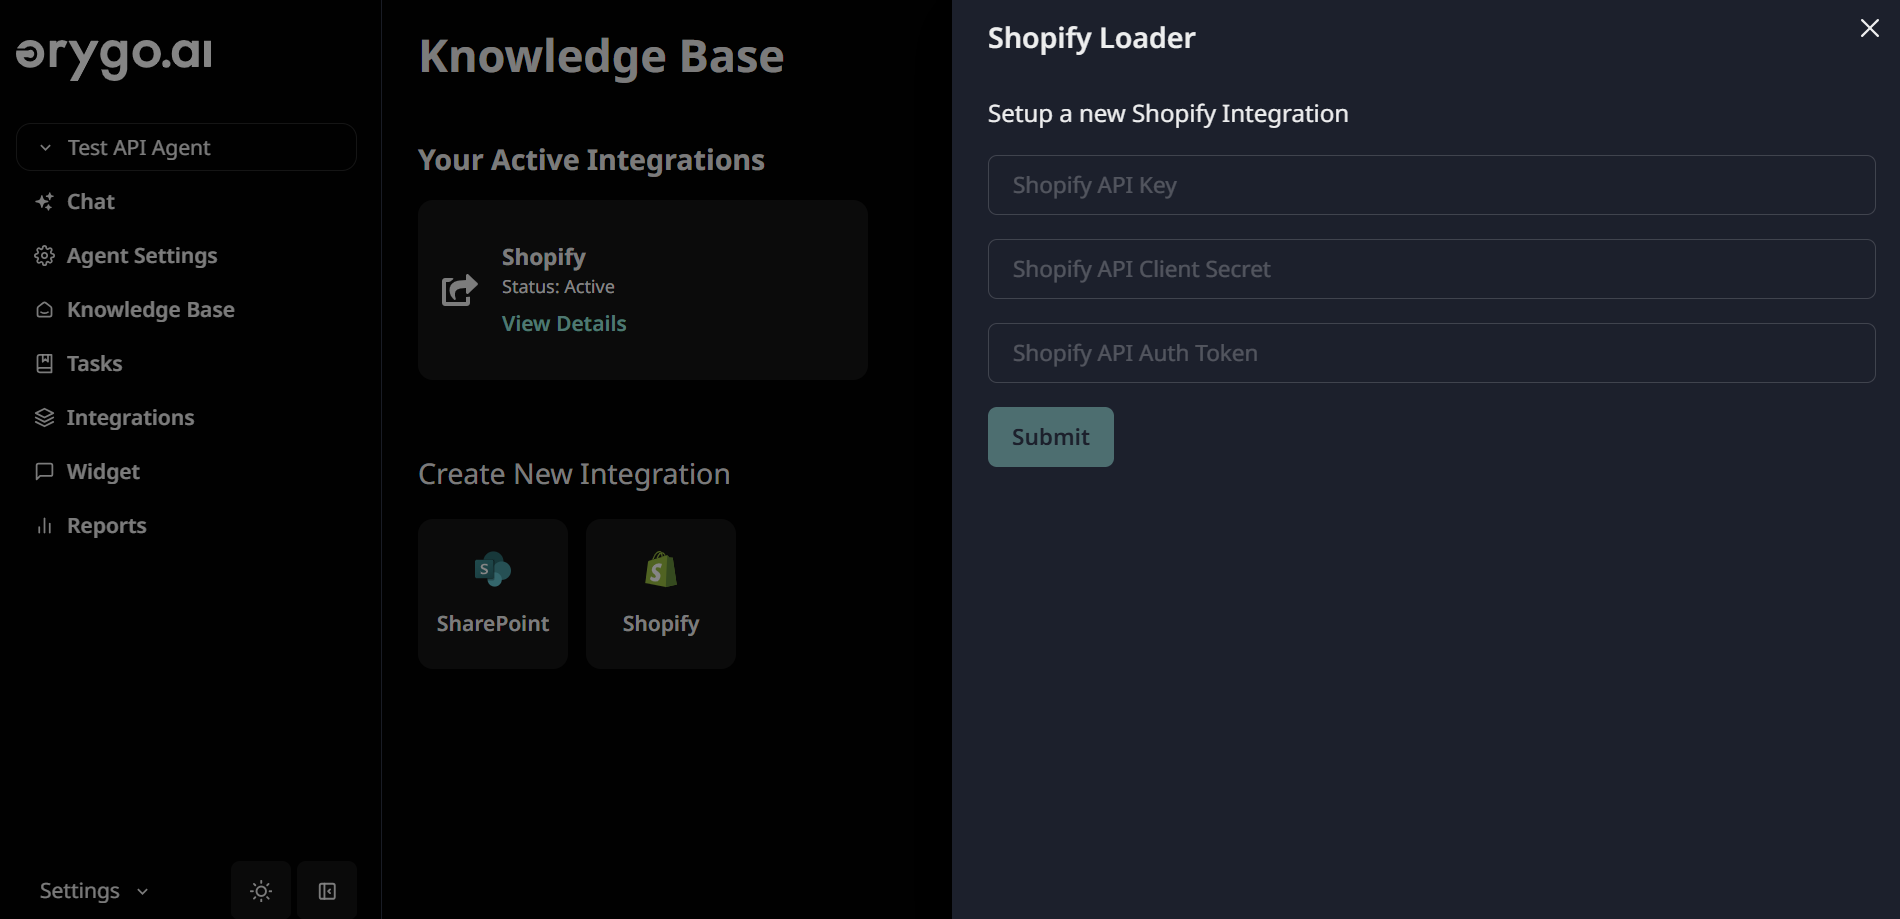
Connect OrygoAI to Your Shopify Store
- In the integration setup, enter the following Shopify app credentials you generated:
- API Key
- API Client Secret
- API Auth Token
- Shopify Store Domain (Format:
https://your-store-name.myshopify.com)
- Your store domain can be found in Settings > Domains in Shopify.

- In the integration setup, enter the following Shopify app credentials you generated:
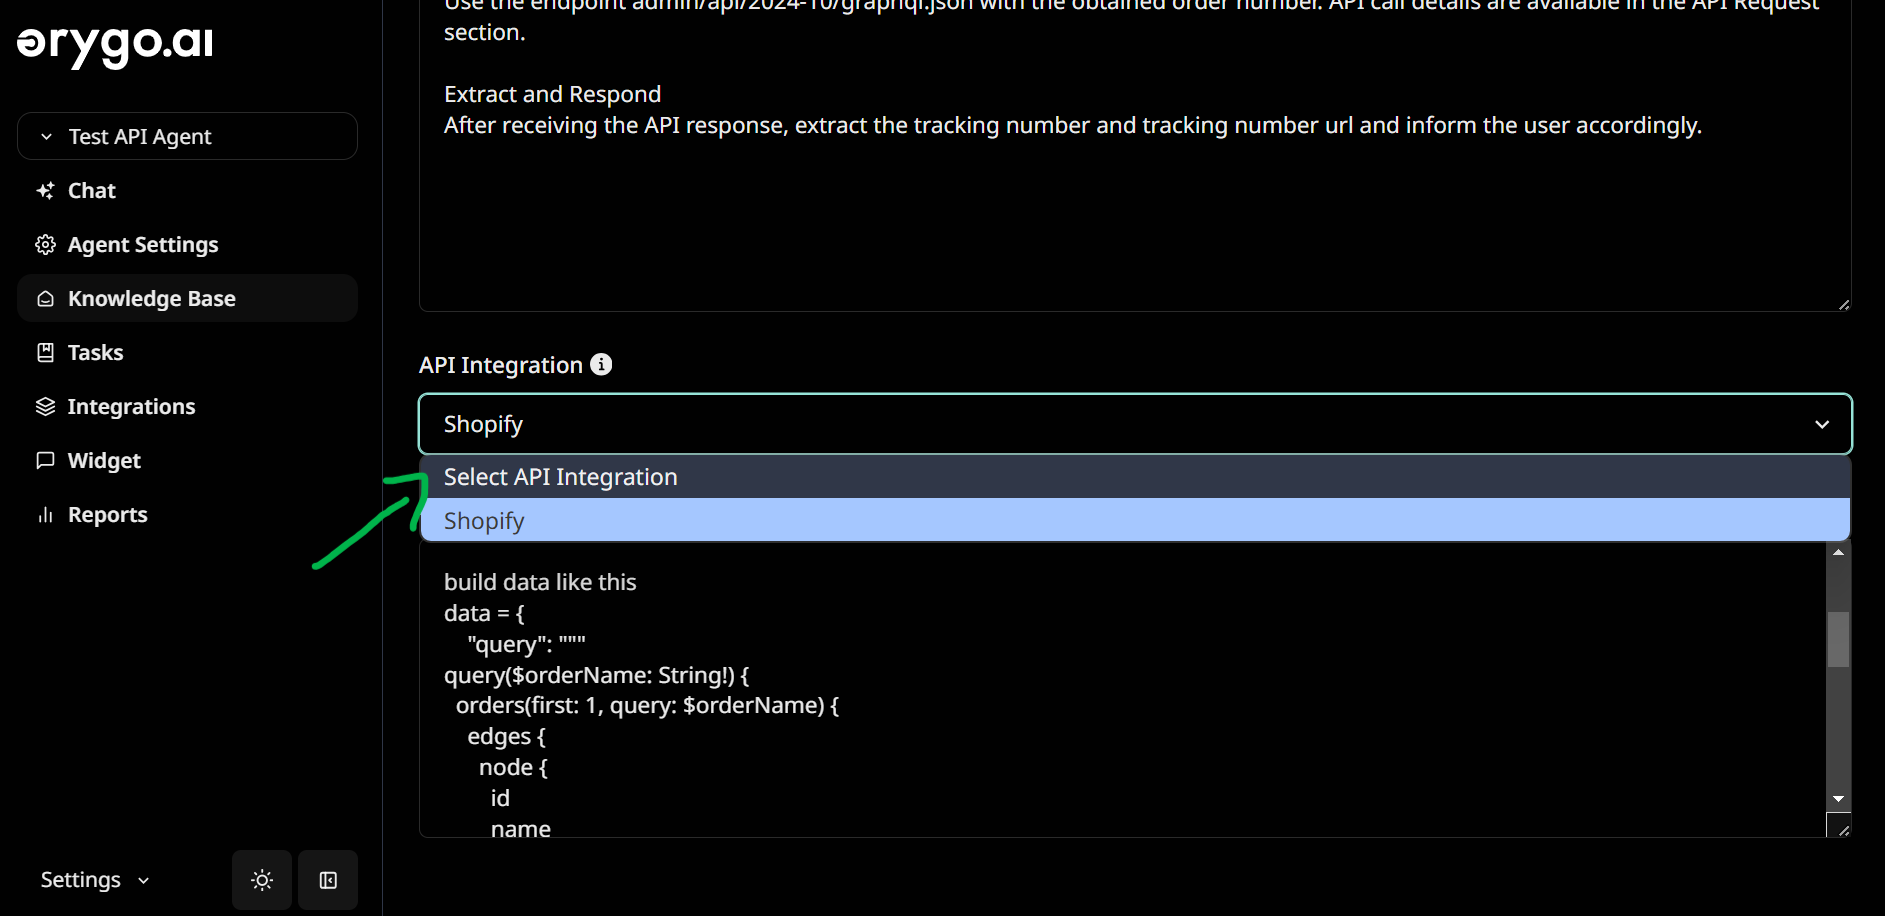
Step 3: Enable API Requests in Your AI Agent’s Tasks
Once the Shopify integration is active, you can set up tasks for your AI Agents that require Shopify API interactions.- Go to the Tasks section and create a new task or select an existing tasks
- Select Shopify from the API integration dropdown.
- Add the API request details in simple, natural language. For example, you can create a task that enables your AI Agent to retrieve and provide customers with order tracking links.